Showing posts with label CRAFTERNOON. Show all posts

Tuesday, December 20, 2011

Crafty Wonderfulness From My Sister

My sister is neither crafty nor a blog reader. Just ask her. In fact, I'm not sure she's ever read my blog. (Can you imagine?) But, she sent me a dozen pictures of her recent holiday decor demanding I share it with Mainelyhome readers. Inspired by a costly wire lit Christmas tree at a nearby gardening shop, my sister took a wire tomato tower and draped lights over and topped with a bow. And, I must say, it looks darn cute, don't you think?

Tuesday, March 15, 2011

Crafternoon: Quick and Easy Custom Notebooks

I could easily spend a fortune on goodie bags. I love them.

But, I was trying NOT to do that for my daughter's recent fairy-themed tumbling party. I was trying to be thrifty - and trying not to plague other households with a lot of junk. But, I also wanted the goody bags to tie-into the fairy theme...

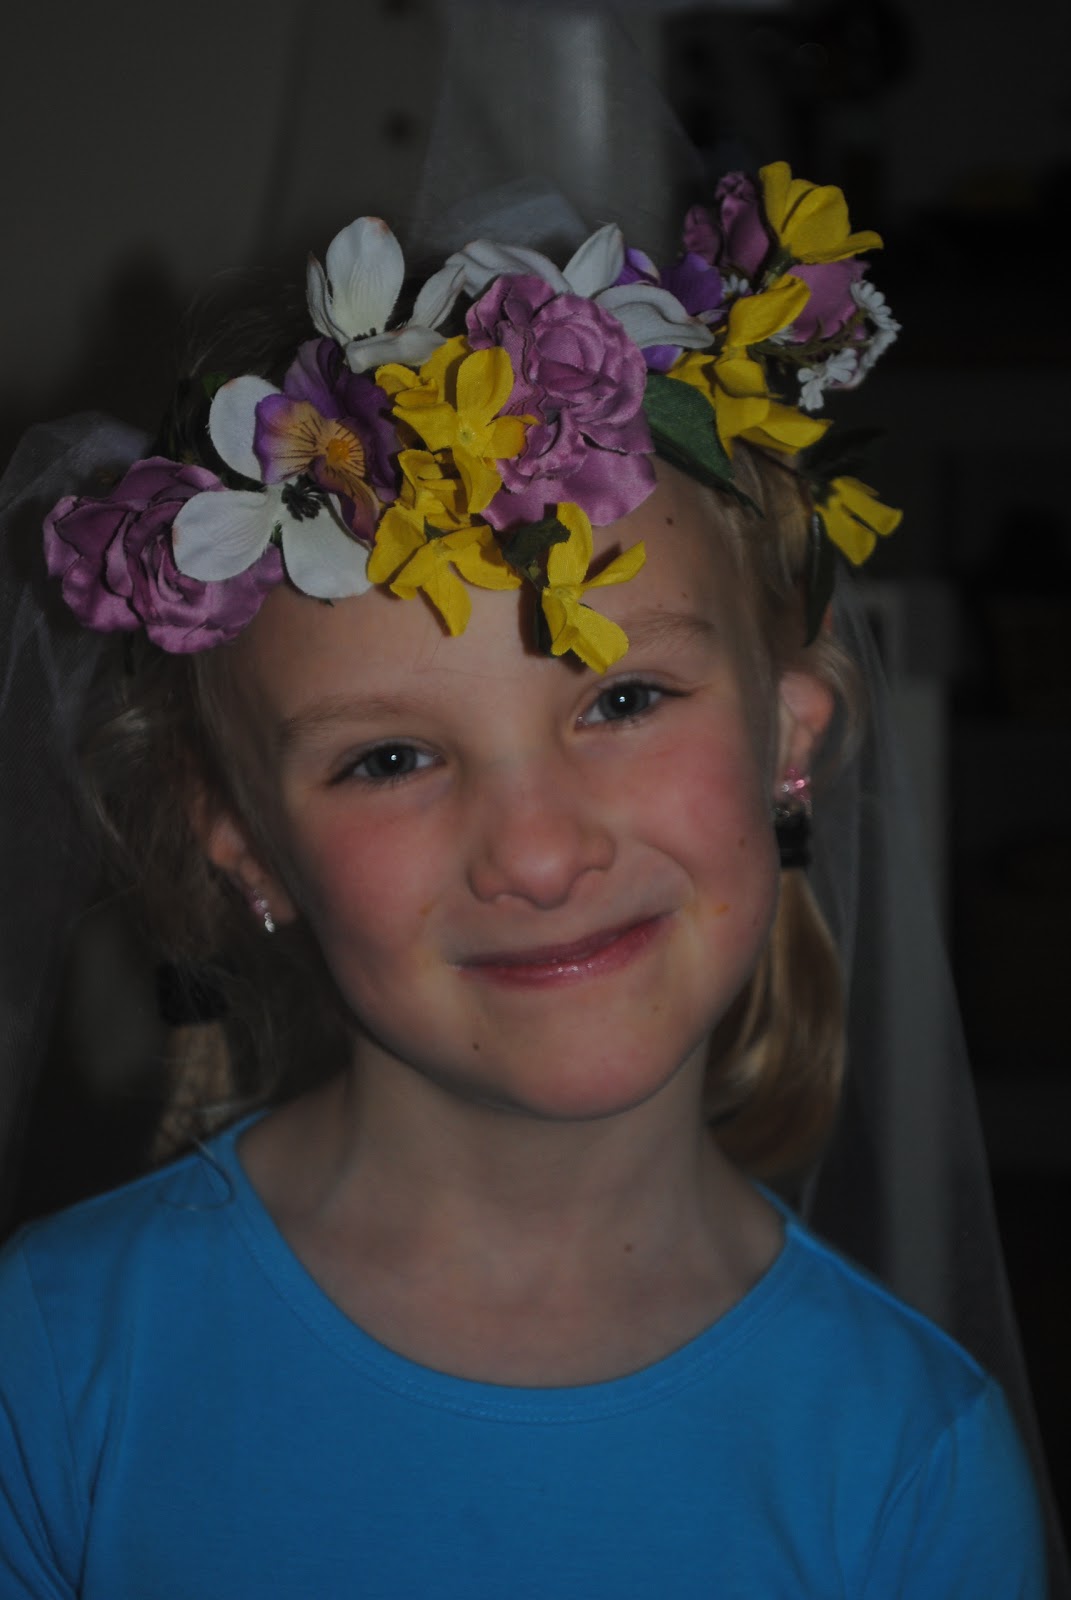
A glowing ring (fairy magic ring). A flower pencil (a want, according to my daughter - love her imagination!). A notebook (for writing fairy wishes). Fairy-like stickers. And, a flower fairy crown (which will double as decorations while the girls are tumbling). Perfect? Well, good enough, at least.

The fairy crowns were a piece of cake (though a bit time consuming when you start making multiples!) thanks to floral wire and floral tape and a whole slew of fake flowers and tulle.


The thing that hung me up was the notebooks. All the cute notebooks cost a lot. So, I took a gamble and purchased little spiral notepads -- pack of 3 for $1.00 -- with hopes of customizing the covers.

My little fairy and I set to work with some decorative papers I had in my stash, a paper cutter and a glue stick. Easy-as-pie and, I think, super cute.

Thursday, January 13, 2011

Warm Hands = ?

{photo via Once Wed}

Warm hands = cuteness and a fabulous Crafternoon activitywhen it comes to these adorable handmade handwarmers. Take those unsightly disposable handwarmers and give them style with little wool pouches. Here's the how-to.

Wednesday, October 20, 2010

Crafternoon: Featuring My Husband!

I know, I know, it has been much to long since we've crafted over here at Maine-ly Home. Believe me, I'm suffering. But, it's back. And, I'm really pleased to share this "crafternoon" (which was more like a whole lot of early mornings and evenings) with my husband.

Move over, Martha Stewart. Meet my husband.

My crafty (who knew?) husband took a bright yellow plastic kayak and turned it into a totally camouflaged vessel designed for "looking for" ducks and geese.  It wasn't easy.  

He researched what ready-to-buy camo boats look like; he researched options for how to effectively cover plastic (I scored big points when I pointed out that Krylon makes a spray paint especially for plastics--and, wouldn't you know, he discovered they make it in camo colors!); he researched what patterns of reeds and grasses make you most sneaky;  he researched accessories (e.g. clips to attach duck decoys); etc.  
Armed (!) with duct tape (yup, it comes in camo, too!), spray paint -- and his own stencils (yes, he made stencils! I asked him, jokingly, if we were going to use those same stencils to decorate our bedroom. He didn't take it as a joke, so now I live in fear that I might come home one day to be living in a stenciled duck blind.) 

Ultimately, he created his very own, one-of-a-kind, waterfowl-seeking hide-a-way. Pretty, cool, huh?


Now, let's see what he can do with some wool, buttons and a glue gun!

Monday, June 7, 2010

Crafternoon: My New Obsession

Yup,  knitting baby hats, that's my new obsession.

And, I just love this new pattern I adapted (aren't I fancy adapting my own patterns!?!) slightly from this pattern.

Except for the fact that I had to re-do this entirely because my sweet little toddler pulled out some of my first attempt (and, I'm not a fancy enough knitter to know how to fix things...), this was super easy and quick.

Rolled Brim Baby Hat with a Topknot
(size 0-6 months)

What You Need:
  • Size 7 Needles: I used a 16" circular, then switched to size 7 double point needles when I started to decrease.
  • 1 skein of worsted weight yarn. I used a soft acrylic yarn from Michael's called Impeccable in Seaside Ombre.

How to Make:
Cast on 72 stitches
Join in the round, being sure not to twist your stitches. Mark where your round begins, and move along row-to-row.
Knit.
Within a few rows, your knitting will begin to roll (this is your hat's brim).
Knit until your project measures about 4.25" from the bottom of the rolled brim (don't unroll the brim to measure).
Move your project to double point needles.
Begin decreasing as follows:
Row 1: k6, k2tog, repeat around
Row 2: k5, k2tog, repeat around
Row 3: k4, k2tog, repeat around
Row 4: k3, k2tog, repeat around
Row 5: k2, k2tog, repeat around
Row 6: k1, k2tog, repeat around
Row 7: k2tog, repeat around
You should now have 9 stitches remaining on your double point needles (I used 3 at this point.).
Knit until this measures 3 3/4 inches
Bind off.
Weave in the loose end on the "stem".
Tie the "stem" into a knot.
Weave in any other loose ends.
Voila!

Tuesday, May 25, 2010

Crafternoon: The Perfect Family Hat

So, I decided after knitting and felting bowls for 6+ weeks now that I needed to branch out...to step it up...to try knitting something new.

A hat.

Okay, all you experienced knitters, stop laughing at me.

I decided to turn to Halcyon Yarn (a local favorite) for some inspiration. (If you haven't discovered Halcyon, you must check it out online, via catalog or in-person. They have beautiful fiber of all sorts and all the imaginable equipment for all-things-fiber-related.) Naturally, the hat pattern with the title "Family Favorite Hat" caught my eye.


 {photo from Halcyon Yarn}

Who wouldn't want to knit a favorite hat? A quick view of the instructions confirmed that I more or less had the skills needed. (I should point out that this hat would be my first purling experience...) The pattern recommended Debbie Bliss Como yarn (which I happen to know is super soft and wonderful), but I had on-hand some Wool Ease Chunky Yarn (Color: Indigo) from LionBrand that I was eager to use.

Truth is, I'm not much for practicing. I set out to knit this hat--my very first hat--as a gift. Bold, huh?

Well, I did it. I knit my hat. What do you think? (Lousy photos, I know!)


I must say it was really quick (one evening!) -- and fun. Purling? Well, it wasn't as scary as I thought.

Too many mistakes for a gift, so I'm going to follow my Mom's advice and knit in a variegated yarn ("it hides mistakes" she always advises) next time.

Monday, April 26, 2010

Crafternoon: Felted Bowls Oh My!

Although I come from a family with generations of knitters, I have somehow missed the knitting bandwagon.

Truth is, I've tried to learn --but it has never clicked. Until last month. And from one month to the next I've gone from a non-knitter to a knitting fanatic. I'm hooked (Too bad I didn't learn to crochet, that would be a great line!).

Now, don't get too exited, I'm not knitting anything fancy yet. But, I'm knitting almost every day--and each day my stitches look a little more consistent and I get a little more ambitious. And, the production is significant--I'm cranking out finished projects lickety-split.

Sweaters? Scarves? Mittens? Socks? No.

Bowls.

Yes, bowls. 

I found this very simple pattern from a book called One Skein: 30 Quick Projects to Knit or Crochet. The bowl is knit (much like a hat pattern), then felted in the washing machine. I've now modified the pattern some to create the depth of bowl I prefer (Aren't I fancy having the confidence to alter a pattern?).

A Knitted Felted Bowl: Before and After


The knitted/felted bowl is a great quick project (I can crank one out while watching an episode of Brothers and Sisters, for example!:)) and a great way to use up miscellaneous skeins of yarn.

When I tell people I'm knitting bowls--and even when I show them a finished one they are a little perplexed. "What would I use this for," they ask.

C'mon...what wouldn't you use this for?

A place to put your shell collection, a top-of-the-dresser catch-all, a gift basket, a planter, a coffee table decoration....use your imagination! (The collage below -- a collection of SOME of the ones that have been made by my aunt, my mom and me in the last month--might give you some ideas of how to put these bowls to use!)

Wednesday, April 21, 2010

Crafternoon: A Felted Rose

A couple of years ago, my mom invited me to come with her to a short needle felting class. Needle felting? "Yes," she said, "we'll needle felt a doll".

I had no idea what she was talking about.

But, the idea of an evening out with my mom and, well, a break from my toddler was so appealing that it really didn't matter.

So, I joined her.

And, I am so glad I did.

From that night onward, needle felting became "my thing" from then on.

It is a relatively simple craft (all you need is barbed needles, a piece of foam to protect your lap and some wool roving) -- and, moreover, incredibly forgiving (the fact that I'm not good at details, or following directions for that matter, doesn't affect what I'm working on). I've been surprised at what I've been able to make -- from 3-dimensional figures to appliques.


Not a big fan of kits (remember what I said about not being good at following directions?) -- and considering myself a bit of a purist -- I was surprised to find myself considering a needle felting "mold". But, I just had to.

The kit/mold made by Clover (a company that makes all kinds of handy little crafty kits) promised to help me create a 3-dimensional rose--and the potential for use of roses in my life is huge thanks to the addition of my baby Rose.

I bought the kit. But, quickly I learned that I also need to purchase a felting pen and a felting mat.Suddenly, this project was intimidating me (the bigger investment I make in tools always intimidates me)...and I was wishing I'd just stuck to my simple piece of foam and barbed needle.

Finally, with all the tools in hand, I sat down to make my rose. It was SO easy (except that someone should have advised me that I'd need replacement needles for my needle pen....)--and in just 20 minutes I had cranked out a really cool looking 3-dimensional felted rose.


So, now with Bay Rose's 1st birthday just around the corner, I'm busily cranking out roses...brooches for the grandmothers, decorations for her crown...ah the possibilities!

 Here are the materials you'll need for this project.

Wednesday, April 14, 2010

Crafternoon with Mom: Hot Water Bottle Cozy

A few years ago, a friend of mine (who also lives in a cold 160+ year old Maine home) told me she fills a hot water bottle and places it in her bed about 15 minutes before bedtime. She claimed it was just what was needed to take the edge off those cold sheets without cranking up the heat. I thought it was odd, but decided to give it a whirl. I was hooked the first night. So, now I'm frequently placing hot water bottles in all of our beds. Not only does it take the edge off, but it also warms up the toes! I've been admiring some of the cute hot water bottle covers on the market (Yes, if you aren't already aware, there is a big market of cute hot water bottle covers out there.) and decided that crafting one was surely the way to go. I have plans for making one out of upcycled felt (I felt old sweaters and use as fabric.), but just haven't gotten to it, so I put my Mom to work knitting one. She used some old chenille that had been lying around (what a great way to use up yarn!) and this free pattern available from Lion Brand. Now, our beds are cozier than ever!

Friday, April 2, 2010

Forcing Spring Update

Well, it worked. I "forced" Spring into my home. If you've been following my blog, you already know that a little over three weeks ago I cut some cherry blossoms in an attempt to "force" them into bloom. It worked. The result is glorious and just what the doctor ordered to help bridge that gap between Winter and Spring.

One of the extra highlights for me was the my father-in-law, known by many as the gardening guru, had never heard of such a thing...and was so impressed with the result that he called me for advice on how to implement!

Try it. Surely there are some branches within your reach just waiting to be "forced".

Tuesday, March 23, 2010

Crafternoons with Maine-ly Home

I betcha didn't know that March is National Craft Month (who declared this, I'm not sure...)! Well, it is! And, in the spirit of this, I am going to start having "crafternoons"--an afternoon spent making something. (By the way, I can't take credit for this very clever name--but, I sure do love it!) Don't get too excited, it's not like I'm a craft maven who is going to rock your world with the most exciting crafts, but I hope to occasionally inspire you to craft. Stay tuned.

Monday, March 22, 2010

Grow-Your-Own Easter Grass

A few years ago, I started (with the help of my daughter) to grow my own Easter grass. I haven't totally abandoned the commercial Easter grass in its oh-so-fun colors (though I only buy paper grass, not plastic), but I've begun to grow my own grass in festive containers to use as centerpieces. Someday I hope to be organized enough to grow the grass IN the girls Easter baskets and even possibly in some baskets to deliver to others. But, for now, I'm sticking with a few festive containers sprinkled around the house. It's an incredibly easy project -- and a great project to embark on with kids of any ages. Here's the scoop:

What You Need
  • Potting soil (and a small shovel unless you want to use your hands)
  • Containers (Get creative -- pots, buckets, baskets, Easter baskets, egg shells, etc. Note: If you choose to use a basket or something that doesn't hold water, you'll need to line with plastic or cellophane.
  • Grass seed (I use either rye or wheat grass seed/berries which you can typically buy in packets at a good garden supply store.)
  • A spray bottle
  • A sunny spot
How-to
  • Prepare your containers (e.g. if you use a basket or another container not designed for water, line with cellophane or plastic).
  • Fill your container(s) with soil.
  • Top soil with seeds. Add another 1/4 inch of soil on top of seed layer.
  • Use a spray bottle to moisten the soil.
  • Place in a sunny spot.
  • Over the next few days, keep an eye on your containers, misting soil as needed in order to keep it moist. 
  • In a week(ish), you'll have a container of grass. These containers of grass make a simple and beautiful centerpiece all on their own--but also look cute decorated with eggs, chicks, ribbons, etc.

Saturday, March 20, 2010

Forcing Spring Update

Today is the official day of Spring. Where I am standing, however, Mama Earth seems to have forgotten.

In anticipation of needing Spring before it comes into full bloom, I have been attempting to "force" or rather "invite" Spring into my home with some forced blossoms.

The blooms are SO close, but not in time for the first day of Spring. Boo.

Thursday, March 18, 2010

Eggs-axctly What I Was Looking For

I know, I know, it's that egg theme again. :) Crazy egg-obsessed woman.

This time, however, it's all about Easter eggs.

We love decorating Easter eggs. We are not, however, crazy about all those creepy dyes that seem to stay on your hands for weeks. Imagine my delight when I discovered via one of my favorite blogs Soulemama that a new eco- and kid-friendly egg dyeing product has hit the market.

This new product, Eco-Eggs, is an Easter egg coloring kit that uses natural ingredients (e.g. purple sweet potato, paprika, red cabbage and blueberries) to color eggs. The kit also includes soy-crayons for decorating. As if this wasn't exciting enough, I have learned that the kit comes from a Maine company called Eco-Kids

Needless to say, I have ordered the product and I am happy to report it is on its way. Stay tuned for our 2010 egg dyeing adventures...

Wednesday, March 17, 2010

Caving to the Green


In my last post I mentioned that I had "skipped" St. Patrick's Day. Well, I'm taking that claim back. There will be no St. Patrick's Day Craft Basket, but, I have caved, there will be green.

I have my daughter to thank for this shift in attitude.

In fear of the dreaded St. Patrick's Day pinch (clearly a big topic at school yesterday), my daughter carefully picked out today's outfit -- green from the inside out (I'm wishing I'd taken a picture of her at the bus stop this morning.) But, much to my surprise, she insisted on going to bed in this outfit, "Mama, it will be St. Patrick's Day at midnight while I'm sleeping, and I'm not going to risk getting pinched." And, so, she did. She slept in green from head to toe. Over breakfast she drew pictures of leprachans, shamrocks, rainbows, pots of gold and the word "OUCH". :)

After she loaded the bus with a big smile from behind those green sunglasses, I thought, "How could I not catch the spirit?" I wondered what I could do to surprise her this afternoon. I just couldn't stomach the idea of green food (though I'd glady take a green beer if one was handed to me.) And, then, it donned on me. Play dough. Green play dough. Perfect.

So, I promptly set to work to make some green play dough for her to play with this afternoon.

Play dough is great. (I remember with great fondness that on my daughter's first day of montessori preschool her teacher had made a bunch of playdough and said with a very serious face, "Play dough is a great ice breaker." So true. I vowed at that moment, I'd host a party someday with loads of play dough on hand.).

If you haven't tried making your own play dough, I HIGHLY recommend it. It is economical; it lasts longer; it contains real stuff; and it is much smoother to play with (oh, and it doesn't make crumbs the way the commercial stuff does) -- and, I'll admit the process of making it, including using food color and kneading is great fun for me.

If you Google "play dough", you'll find lots of homemade playdough recipes including ones that are entirely edible (e.g. peanut butter play dough). My favorite recipe is below. (If you like the idea of homemade play dough, but don't actually want to make it, I encourage you to look on Etsy.com. There are many crafters making and selling homemade play dough, including gluten-free versions . There's even a few "play dough of the month" clubs--how fun!)

Homemade Play Dough

Materials

* 1 cup water
* 1 tablespoon vegetable oil
* 1/2 cup salt
* 1 tablespoon cream of tartar (This makes the dough last a long time.)
* Food coloring
* Saucepan
* 1 cup flour

Directions

1. Combine water, oil, salt, cream of tartar, and food coloring in a saucepan and heat until warm.
2. Remove from heat and add flour.
3. Stir, then knead until smooth.
4. Store this dough in an airtight container or a plastic bag.